Showing posts with label Yummy Food. Show all posts

Tuesday, December 20, 2011

Last Minute Christmas Wreaths

Need a last minute way to impress the family with some yummy treats on Christmas? A project for the kids to do while you wrap presents? Or, a way to schmooze your way into some extra vacation time from your boss? Or how about a ring? Trying to get that slower than molasses boy to put a rock on your finger? Then try these, they are super duper yummy and you can create a whole batch in no time at all. My sister and I used to make these with my Grandma when we were kids. You know they're gonna be good when they come from a Grandma! :)

You'll need:

1 bag of large marshmallows
1 stick of butter
Green food coloring
3 cups of cornflakes
Red Hot cinnamon candies- found at Dollar Store
Wax paper
Cooking spray


Melt the butter and marshmallows together on the stovetop, medium heat until a thick gooey syrup forms. Add in 15 drops of green food coloring. When it looks like this,


then remove from heat and mix in the 3 cups of cornflakes until they are completely covered in this Grinch-colored oooozy goodness. 
Now lay out some wax paper which has been sprayed with cooking oil spray, butter up your fingers and drop spoonfuls of the mixture on the wax paper to cool for a bit. After they have cooled, (about 4 minutes) then form into wreath shapes with your buttered baking hands. Let your munchkin try too. He'll eat most of it. 

After the gooey mess slightly resembles wreath shapes, place your red hot candies on by pressing them gently into the wreaths. I've heard some people use corn syrup to get these little suckers to stick, but I never have. 

Yum! Now try not to eat them all before you get to your family's house for Christmas! 


Tuesday, April 26, 2011

Bikini Wrap

26 year old me, summer 2006


You hungry for lunch? I am. This morning was my first time all alone in my house since before my little man was born. Crazy huh? I texted my sis for ideas on what to do with myself all morning, (as if I don't have a list full of things to do already!) She said I should make a yummy breakfast, watch a movie and relax while I can. Good idea! So I made some french toast, watched a little of Did You Hear About the Morgans? on Netflix.
That lasted about 37 minutes before I realized I had so much to do! In goes laundry load #1, out go the clean dishes in the dishwasher, weeds get pulled, a wall art project gets started, and photos get selected for printing at Walgreen's. Phew! Time for lunch. Except for it's almost bikini season, (gasp!) and I don't want the mama-gut to make an appearance so here's what my go-to, feel skinny and healthy meal will be today:

Laguna Beach Bikini Wrap :)


tortillas
Earth Butter
sliced carrots, avocado, cucumber, and spinach
mozzarella cheese
fresh squeezed lemon juice
lemon pepper
sea salt
toothpick (for holding it together)


Throw it all together, wrap like a burrito and stick it with the toothpick, and enjoy while reading a silly chick lit book on your back porch in the sun! 

Thursday, March 10, 2011

Cozy Dumpling Soup

Our neighborhood park across the street from our house


There's a lot you give up when moving from the city to the country, although most would argue that Brentwood California is NOT the country even though it is completely surrounded by farmland, lush green hills, and a mountain!  (Ok and like 50 chains stores, restaurants, golf courses, gated residential communities galore...) There's no more Sephora, only it's frumpier, much older cousin Ulta. There's no more super swanky Nordstrom or unique boutiques, only the bright flourescent lights and obnoxious pre-teeny bopper music coming from Old Navy who carries the exact same style of cardigans that it's been selling since the store first opened in 1994. Don't worry, I still love you Old Lady oooops I mean Old Navy, sometimes I find really cute things there for a great price! :) The point is, that if you're looking for the creme de la creme of well anything besides actual trees, nature and such you will most likely find it in the city. Especially those 5 star restaurants, YUM. Or even the 4 star ones, I'll settle for one of those too. Like PF Chang's... Ohhhhh so yummy! The other night I was craving some PF Chang's but from where I am right now that would require a 40 minute drive through bay area rush hour traffic, an outfit that was NOT my VS Pink mama sweats, a flatiron to my hair and a second income. So I decided that I would stay in our beautiful house wearing my comfy sweats while cooing at my adorable blonde child and create this magical dumpling soup while stopping occasionally to admire the stunning view of Mt. Diablo from my kitchen window while the scent of fresh cut grass wafted into my house. Suburbia at it's best!

Cozy Dumpling Soup
adapted to enhance the yumminess from the December 2010 issue of The Food Network Magazine

4-6 cups of low-sodium chicken broth
1 cup of thick sliced ham or pork diced or sliced (I didn't have ham so I slow-cooked some pork in beef broth, lots of ginger and soy sauce)
2 tablespoons dry sherry or Chinese rice wine
2 tablespoons soy sauce
Fresh, grated ginger to taste
Sliced ginger if you REALLY love it like myself
4 3-inch strips orange zest
Kosher salt, (or sea salt because I'm not Jewish) and freshly ground pepper
2 scallions sliced, white and green parts separated
2 medium carrots thinly sliced
2-3 collard greens leaves thinly sliced
24 frozen Trader Joe's chicken or vegetable dumplings or pot stickers

1. Combine the broth, ham, sherry, soy sauce, ginger, orange zest, 1/2 teaspoon of salt and pepper to taste in a large pot. Cover and bring to a boil over high heat. Add the scallion whites and carrots. Reduce heat and simmer, uncovered until carrots are crisp-tender about 4 minutes.
2. Add the collard greens, dumplings and scallion greens. Cover and cook until dumplings are soft and heated through, 4-5 minutes. Divide the dumplings and soup among bowls and feast away!

My husband always requests rice with any asian dish but he's not the one trying to work off his mama-gut I always say! But, if you have self-control, (which I do not when it comes to food) and a husband who thinks he's half-Asian, by all means make the rice. But use brown because we all know that, "The whiter the bread, the sooner you'll be dead!" -Michael Pollan author of Food Rules and a designated repository for the nation's food conscience.


Thursday, February 24, 2011

Stir-Crazy Red Velvet Cupcakes


It is naptime. Aaaaahhhhh the most blissful time of the day. The time where I get to enjoy all my favorite indulgences like curling up with a good novel, some Hagen Daaz, all while wrapped in my $100 faux fur and velvet Potterybarn blanket, (my favorite wedding gift by far from my posh Texan aunt) which only comes out when baby isn't around to slime it with his cute grubby little fingers.
Today I am blog-stalking, you know as in checking out the competition. Making sure I'm still as interesting as all the other 15 gazillion mommy bloggers out there. :) Then, I come across THE recipe! Red velvet cupcakes for her little daughters 5th birthday...Mmmmmm sounds sooooo good, especially since I not only worked out hard this morning at the gym, but also am trying to incorporate some vegetarian meals into my diet which means I had a vegetarian wrap for lunch. (See my brain is wired to think that meat must be a part of EVERY meal- working on changing this!) Anywhoo, I don't know if it was the lack of smoked turkey in my lunch today or the fact that I'm going on 5 days of being cooped up in the house with a sick toddler who desperately wants to go to the park every single minute of the day...every. single. minute...
But those red velvet cupcakes looked soooooo delish and I suddenly had this uncontrollable urge to make them! Before you could say, "stir crazy!" I found myself in the kitchen pouring a little bit of this and some of that, flour flying and buttermilk splashing into pure, uninterrupted confectionary creating bliss!
So what if I didn't get around to cooking dinner today? What laundry? And WHO needs me to call them back for the 3rd time!? Forget it! This was waaaay more fun! :)

Stir-Crazy Red Velvet Cupcakes
(With cinnamon cream cheese frosting)-i die!


1/2 cup (1 stick) unsalted butter, softened
1-1/2 cups granulated sugar
2 eggs
1/4 cup natural unsweetened cocoa
1 tablespoon of Wilton pink gel food coloring
1 teaspoon salt
2 1/4 cup cake flour
1 teaspoon vanilla extract
1 cup buttermilk
1 teaspoon baking soda
1 tablespoon white vinegar
Ingredients for the frosting:
1/2 cup (1 stick) unsalted butter, softened
12 ounces cream cheese, at room temperature
1/4 cup sour cream (not light)
1 tablespoon vanilla extract
2-3 cups sifted powdered sugar
1 tablespoon Wilton pink gel food coloring
Directions for the cupcakes:
Set the oven rack in the middle of the oven and preheat to 350 F.
In the bowl of the stand mixer, cream the butter and the sugar.
Add the eggs, one at a time, mixing after each.
In the small bowl, stir the cocoa, and food color to make a smooth paste. Add this mixture to the egg mixture and mix until the color is consistent throughout the batter.
Add the buttermilk, vanilla, salt, and cake flour. Mix until the dry ingredients are fully incorporated. Add the baking soda and vinegar and stir gently. The mixture will bubble and froth a bit.
Pour immediately into the prepared cupcakes pans with paper baking cups.
Bake in preheated oven for 13-18 minutes, until a toothpick comes out clean and the center springs back when gently depressed. Remove from oven and cool in the pans on a wire rack for 10 minutes.
Directions for the frosting:
Cream the butter, cream cheese, sour cream, cinnamon and vanilla together until fluffy. Gradually mix in the powdered sugar, starting with 2 cups. Continue adding more sugar 1/4 cup at a time until you have the desired flavor and texture. Add food coloring, start with half a tablespoon and then add more till you have your desired shade of red.
Frost those little cakes and hope that you have time to eat one before your baby wakes up! :)
Enjoy!!!

Saturday, December 18, 2010

Herbed Chicken Pot Pie

Baby, it's cold outside! Warm up your life with this scrumptious chicken pot pie! Oh and it's not your great grandma's bland old church potluck version, oh no! This is much more flavorful and savory. Mmmmm, chicken pot pie the way it should be with richly seasoned rotisserie chicken and you can even use fresh herbs if you have them available. If not, used the dried ones. I don't measure the herbs so just add them to taste.

2, 9 inch ready made pie crusts, thawed
1 rotisserie chicken
1 package of frozen mixed vegetables- peas, carrots, corn, and green beans
1 can cream of mushroom soup
2 cups of water
1 teaspoon chicken bouillon granules or poultry seasoning
1/4 of a yellow onion chopped
fresh ground black pepper
sea salt
Italian herb grinder seasoning, or fresh rosemary, oregano, basil, and parsley
Lawry's seasoned salt
garlic salt

1. preheat oven to 400 degrees
2. Open can of cream of mushroom soup and pour into a saucepan. Add frozen veggies, water and chicken bouillon to taste.
3. Sautee cooked rotisserie chicken with chopped onion in some olive oil. Add all seasonings to taste.
4. Add herbed chicken to the cream of mushroom mixture.
5. Pour chicken and soup mixture into one pie crust and cover with the other crust. Seal the edges and cut a small steam hole in the top crust. Bake in the preheated oven 30-35 minutes or until crust is brown.
It's so amazingly good, warm and comforting that you'd better make two and freeze one for a rainy day! 

Thursday, December 2, 2010

Baked Oatmeal


Did you know baked oatmeal is a new thing?! I had no idea!!!
I knew you could bake it into cookies...but THIS!? THIS is amazing!!!
Baked oatmeal is very different from the stovetop kind. The consistency is close to cake but the edges turn out all crispy like a cookie! It's fabulous! If you don't eat regular oatmeal because you detest the goopy consistency, THIS baked version will change your life! Oatmeal just got much more fabulous and a LOT more classy! Here's the recipe adapted from allrecipies.com...serves four people or two REALLY hungry people :)
1 1/2 cups old fashioned oats (the quick cooking variety will break down and get soggy)
1/2 cup  dark brown sugar
1 teaspoon ground cinnamon
1/4 teaspoon freshly grated nutmeg
1 teaspoon baking powder
1/2 teaspoon salt
1/2 cup milk (any fat content will do)
1/4 cup melted butter
1 large egg
splash of vanilla extract
handful of dried cranberries (optional)
Granny Smith apples, fresh raspberries, slivered almonds and pistachios for topping (Use your imagination)
Place a rack in the center of the oven and preheat oven to 350 degrees F.
In a medium sized bowl, whisk together the oats, sugar, cinnamon, baking powder and salt.  In a separate bowl, whisk together the milk, butter, egg and vanilla extract.  Add the wet ingredients to the dry and stir to incorporate.  Fold in the dried cranberries.
Pour mixture into a lightly greased 9-inch pie pan.  Place in the oven and bake for 20-25 minutes, until lightly firm to the touch and no wiggle remains.
Remove from the oven, let cool for 5 minutes then spoon into serving bowls.  Top with milk, fresh fruit and nuts and serve.

Bon appetite! 

Monday, November 29, 2010

Eat Local, Your Vote Counts!

One of the great benefits of living in the East Bay area are little treasures like these yummy fruit stands. This particular one lives only 3 miles from our home. I can practically roll outta bed and go pick up some breakfast! Smith Family Farm is by far my most favorite! They have an awesome produce stand as you can see, a pumpkin patch and petting zoo in the fall, and all kinds of Christmas trees for the holiday season! I love, LOVE the fact that most of our produce is grown close to home making it green and much more nutritious than the latest spread at the grocery store which has been sitting in a warehouse for  a few months. According to One Million Acts of Green : A lot of the food we eat in North America has travelled a great distance to get to us. On average, various food items travel more than 2,400 kilometres. That’s a lot of energy, transport and storage. Plus, all that food is shipped in controlled environments, which depletes nutrition. Buying local produce means your food is fresher. It also helps local farmers and reduces air pollution.  


Someone else really loves it too! 

Saturday, October 30, 2010

The Art of Using Fresh Pumpkin To Bake


MMMMMMM it's pumpkin season again and I am in LOVE with pumpkins. So far I've made pumpkin pie, pumpkin bread, pumpkin pancakes, pumpkin soup and now this yummy pumpkin cheesecake! It's a fairly easy recipe for such an elegant looking pie! For the complete recipe go here and check it out! I always use brown sugar even when it calls for white sugar in all pumpkin recipes because it tastes much better that way. When I'm feeling a bit wild I'll add some maple syrup to the mix too! And maybe some Trader Joe's Tahitian Vanilla extract-yum! (Betty doesn't know everything!)
For a series of pictures to inspire your baking, continue reading :) 
First, take a trip to the pumpkin patch and pick out some pumpkins. Some say there are special "baking pumpkins" you can look for but Aiden says that they are all the same to him! (He picks the best ones!) 
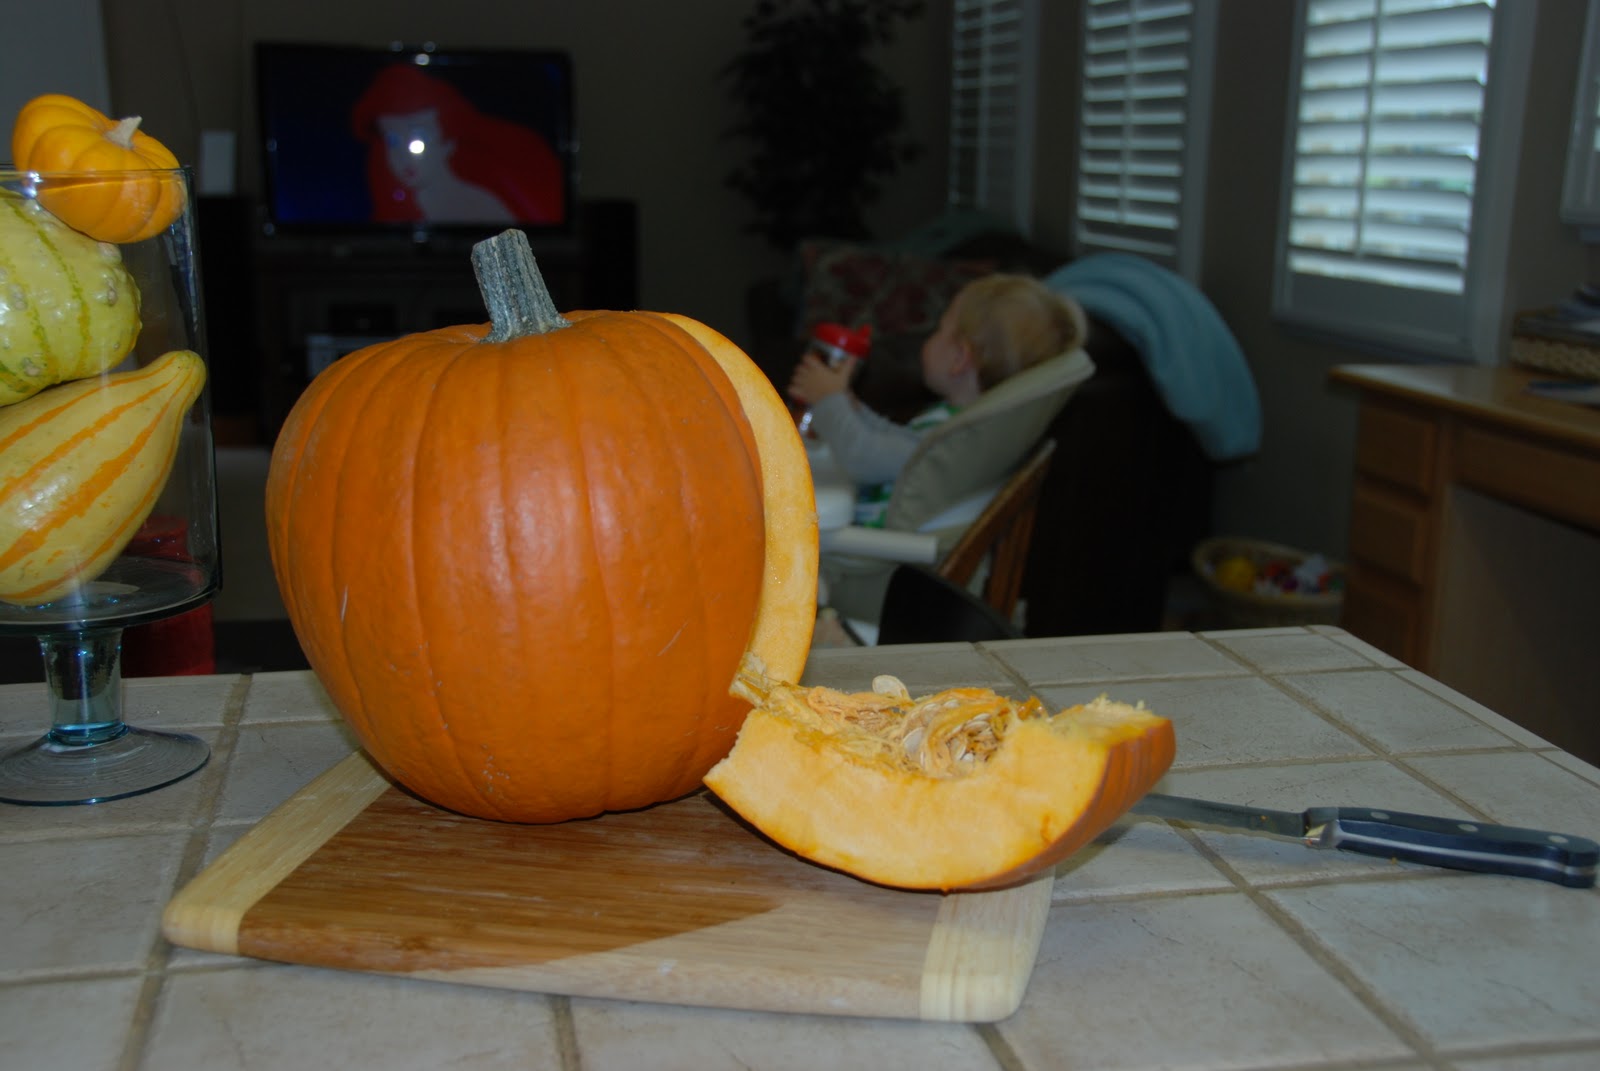
Next, set your baby in his highchair with a snack and a special movie on TV so you can uninterruptedly begin carving up this ginormous vegetable. Make sure to warm up your muscles with a few jumping jacks beforehand, this carving business is a lot of work! Whew! I always feel a little guilty just throwing away the rinds of the pumpkin. If I had a hog out back, I'd throw it to him. If my husband didn't shut down my composting station in the backyard, it would have gone there. (We need an actual composting bin from Lowe's, the flies and smell were too nasty for this prissy little city neighborhood) If we could recycle them, I so would. But since we have none of the above, (for now) I just toss them in the trash. Sigh. Oh well. 
Now, after you've carved up and baked the pumpkin at 350 for about an hour and a half, scrape out the mushy pumpkin straight into the blender to make your puree. I add a bit of salt to the puree to help preserve it when I freeze large amounts and for the jar that remains in the 'fridge too. 
Yummy homemade pumpkin puree! Now you can truly ditch the canned stuff that's most likely been sitting on the grocery shelf for A YEAR! GROSS! YOU really gonna EAT THAT!!!????? This will taste so much better, just you wait and see! And no, not just because you used up an hour and a half of your life preparing this pumpkin mush, but because it really does taste more like, well pumpkin and not whatever they add to the canned stuff to make it last years on the shelf. YEARS...(Just breathe that in for a second)
Oh and don't forget to take your kid down from the highchair when you've put up that big carving knife. He wants to play with his cars. 


Tuesday, October 5, 2010

Baby's Nanna Oat Breakfast Bars

On mornings when we need to be out of the house by 8:30am for playgroups, doctor's appointments, or other activities we eat these yummy homemade cereal bars alongside a hard boiled egg or some Greek yogurt for some extra protein. Just like banana bread but a lot healthier! 
1/2 cup Sucanat (or other unrefined evaporated cane juice)

1 Tbsp finely ground flax seeds

1/4 cup plain or vanilla soy or almond milk

1/4 cup sunflower or other light-tasting oil, preferably organic

1 tsp pure vanilla extract

2 medium, very ripe bananas 

1/3 cup dried cranberries (optional)

1-1/2 cups old fashioned rolled oats (not instant) 
1/2 cup unsweetened shredded coconut

1/4 cup whole oat flour 

1/2 tsp baking powder 

1/8 tsp (.5 ml) fine sea salt
Preheat oven to 350F.  Line an 8”  square pan with parchment paper, or spray with nonstick spray. In a medium bowl, combine the Sucanat, flax seeds, soymilk, oil and vanilla. Cut the bananas into chunks and add to the bowl. Using a potato masher or large fork, mash the bananas into the mixture, leaving a few little chunks (about the size of peas) here and there. Stir in the raisins, if using. Set aside while you measure the dry ingredients, or at least two minutes. In a large bowl, combine the remaining ingredients. Pour the wet mixture over the dry and stir well to combine. It may seem too wet for a bar dough; this is as it should be.
Scrape the mixture into the pan and smooth the top. Bake in preheated oven 40-45 minutes, rotating pan about halfway through, until the top is dry and a tester inserted in the center comes out clean. Cool in pan for 10 minutes, then turn out onto a rack to cool completely. Makes 12 bars. May be frozen.
Gives baby lots of energy too so that they can go and do things like this: 


Friday, June 4, 2010

Veggie Makeover and A NEW Culinary Playground Coming Soon!!!

Do you want to know WHY your kids wont eat their vegetables!? It's because you probably don't give them any flava flavor yo! I'll tell you my secret: how 'bout next time when you are steaming your tot some carrots you add in some olive oil, chicken stock, and a little bit of garlic salt just to give them a kick. I did this and boy did Aiden gobble them up! (Oh and serve them FIRST) He even asked for MORE! MORE VEGETABLES!!!????? Do I have a dream kid or WHAT? :) The secret really IS in the Swanson's broth. Use it instead of water when steaming the veggies, or mix with water. Better yet, get the organic version at Trader Joe Bag's and wa-la!
Are the carrots making an appearance at Asian night? Then in place of the chicken broth and garlic salt try steaming them with a little honey mixed into the water with some ginger. Oh yeah so good!
Peas go well with a touch of lemon juice and fresh mint, broccoli goes well dipped in ranch, yams are awesome with cinnamon, butter and a touch of brown sugar, you get the idea. And spinach, well spinach happens to make a wonderful fruit smoothie, check out this blog for the recipe! Aiden and I are going to try and drink 3 of these a week. One hippie friend says that this smoothie tastes especially good in a mason jar :) With all the fresh, (and I mean Farmer's market fresh) produce going into my kid's body I should probably start auctioning off his Grade A poop on Ebay and call it, "Baby Beanstalk Fertilizer" or something like that :)
One more tip before I go- part of my cooking schedule involves chopping up fresh dipping vegetables on Mondays like broccoli, carrots, peppers, ect. and storing them in tupperware in the 'fridge. If they are already prepared with your favorite dipping sauce then chances are you will be more likely to reach for those instead of a box of Cheez-its :)
Oh and speaking of farmer's markets, check out what's coming to Jack London Square in Oakland very soon...The World Famous Jack London Market!!!!! Oh my goodness I am sooooo excited about this!!!! It will be an amazing place to spend a day tasting and shopping for the bay area's best local and sustainable produce, meats, seafood, baked goods, wines, cheeses, ect. This is so awesome because I was just researching on which farms in the bay area sell grass-fed meat so I could visit a farm and buy some meat. Now I can also go here! There will be culinary events, a bookstore, and organic restaurant all within a beautiful six-story structure with breathtaking water views from every floor!!! Watch the short video, you will be amazed! And jealous of me when I'm shopping there! :) It'll make your local Whole Foods seem LAME in comparison! :)

Wednesday, May 19, 2010

How To Create a Fondant Work of Art

First gather these supplies...
  • non-stick rolling pin, non-stick baking sheet thingie with measuring circles, mixing bowl, measuring cup, 1 stick of butter, 1 bag mini marshmallows, vanilla extract, 1 bag of confectioners sugar
Go here to learn the top secret fondant recipe- all recipes

  • After you've made your fondant and it's been refrigerated overnight...
Now if you are a crazy person like myself you'll feel that spending 45 minutes making the fondant wasn't enough so you'll crank out 30 cupcakes just to even things out...


  • Rub your hands with butter and roll it out on a flat surface 
  • Now, get your special Duff Color Gel out and knead just a small bit into the fondant. You cannot use regular food coloring, it will not stick as well or give your fondant a rich enough pigment. Get the Duff gel. :) 
Now that your fondant is colored, you can begin the fun shape making! It's just like working with play-dough except it tastes yummy so watch out, you'll be eating some along the way! 


    And here's a look at the finished product! A "mod-monkey" 3-tired fondant cake! And some cupcakes because I just couldn't help myself!


    Oh and here's one more close-up of the cake...OOPS! WRONG PIC! This is what I USED to do before becoming a mommy spending countless HOURS in my kitchen like an Amish wife...partying it up! :)

    Ok here's another cake pic...


    It really wasn't all that bad making the cake. I mean, between preparing and baking the actual cakes, making the fondant, trying to keep my 1 year old from jumping off the couch with buttery fingers, dying the fondant, cutting the shapes, and assembling the cake while talking on the phone...I'd say it took all of the patience I had stored up for the entire year of 2010. I'll probably NEVER do it again next year! :)


    Thursday, March 11, 2010

    Yummies for Aiden's Tummy


    From the moment I learned of my pregnancy with Aiden, I became super careful of what I put into my body. I drank so much water and when I did occasionally have a soda it was a Hansen's and not a Pepsi. I added more fresh fruits and vegetables to my diet and cut out red meat completely. (Well actually my body did that on it's own as I was disgusted by red meat my entire pregnancy.) I believe it may have been a natural defense mechanism of my pregnant body, loosing the cravings for foods that were not so good for myself and my baby and replacing them with cravings for foods such as fruits, veggies, whole grains and white meats. Every time I ate something that was not going to be beneficial for my growing fetus such as a cookie or a king-sized Butterfinger bar, I imagined my tiny baby ingesting all that sugar and the guilt set in. This kept my sugar-binges under control. I always ate whenever hunger set in because I knew if I didn't, nausea would come and that wouldn't be a pretty sight. For the last trimester of my pregnancy I even woke up at 4am with this crazy, insatiable hunger that wouldn't allow me to sleep until I ate. I remember feeling like my stomach was eating itself away until I fed it. My little guy was sure hungry at all hours of the day and night just as he would be after he was born.
    After I gave birth and began breast-feeding, I continued to have an even greater awareness of what was going into my body as I held my little angel baby looking at me with his little, trusting eyes. I continued the healthy eating with the mindset that I was the sole source of all his nutrients, AKA the "liquid gold."  I began feeding Aiden whenever he wanted it from me, free of any schedule. Somewhere in all the preparing for motherhood books  I remember reading about how some people think it is so important to put baby on a feeding schedule from day one. Something about this felt off even before I dabbled in my knowledge of the attachment parenting principals. I mean seriously, do we deny ourselves the luxury of eating whenever we feel the need? Then why is it necessary to apply this scheduling to a newborn baby who doesn't even know night from day? Who's needs are we fulfilling when we schedule a baby? Ours or theirs? And who's needs should come first? These questions led me to learning more about attachment parenting or parenting on instinct. It felt right to honor my baby's need to be fed at any time just as fulfilling my need to eat at all hours during pregnancy.
    As Aiden grew and began eating solids, I began to get more creative and making all of his food myself. I just figured if I'm already feeding him the best milk possible, why mess up the plan with processed baby food? I feel that just the act of breast-feeding sets your mind to continuing the pattern of eating whole, fresh foods as much as possible. It becomes part of your sub-conscience. You are what you eat right? So my baby food making frenzy began. I made friends with my magic bullet, a butternut squash from my local farmer's market and these little baby cubes containers, (for freezer storage) and was happy to put in a little extra effort to give me the peace of mind that I was providing him with the most nutritious food I could.
    Aiden is now 11 months old and thriving. His favorite foods are yams, bananas, apples, guacamole, my home made chicken noodle soup and as of tonight my, "Go Green Orzo" which I created tonight in a pinch as we had almost run out of Aiden-friendly foods. Before eating this dish, Aiden refused his peas. He threw them at me. He smashed them into his hair. He even faked coughed as if he was choking on them. I had to think of a way for him to enjoy them so I came up with this recipe on a desperate attempt for him to re-think his boo on peas. He LOVED it! Yea!  Here's the recipe, happy eating!

    Aiden's Go Green Orzo

    1 box of orzo
    1 small tub of pesto sauce, (or make your own)
    1/4 stick of butter
    1/3 cup shredded mozzarella cheese
    1 bag of (thawed) frozen peas

    Cook orzo according to directions on the box. Drain and add butter, cheese, pesto sauce and peas. Mix and enjoy!

    This post is part of the 2010 API Principles of Parenting blog carnival, a series of monthly parenting blog carnivals, hosted by API Speaks. Learn more about attachment parenting by visiting the API website.

    Monday, September 14, 2009

    Prego-Friendly Chicken Alfredo

    When I was pregnant in my first trimester, I was in the very picky stage where not many things sounded very appetizing and had a hard time finding yummy foods to eat. Then one night, my friend *Kevin said he was going to cook for Tim and I. I told him not to worry about me because I had no appetite. He said not to worry, the dish was "prego-friendly." What a sweet guy! I tried, and I LOVED!!!!!!! I was in LOVE!!!!!! (with the pasta) :) I then wanted it all the time and it became my most favorite prego food ever! And I am still loving it now! Here is the recipe, Enjoy!!!!


    One Pint Heavy Whipping Cream
    Two Carrots
    One Cup Broccoli
    Half cup mushrooms
    One large Jalapeno
    One cube butter
    One tablespoon flour
    2 chicken breasts
    Olive oil and garlic
    One bag of rigatoni
    Parmasean cheese

    1. Cut chicken into small pieces and fry with olive oil and garlic, when done set aside in bowl
    2. start water boiling for pasta
    3. put heavy whipping cream in very large pan on low heat
    4. Cut mushrooms/carrots into small slices.  Dice jalapenos, break broccoli into small pieces
    5. put pasta into water--usually takes 12-13 minutes
    6. in same pan you used for chicken, fry veggies on high heat (with olive oil and garlic)
    7. melt cube of butter into bowl, add flour and mix very well
    8.  when veggies are about done, put chicken in with them, cook them together.
    9.  add flour/butter mix to heavy whipping cream and stir very very well
    10.  add everything together in largest pan and simmer on HIGH HEAT.  Add parmasean cheese on top.  Simmer 4-5 minutes.
    11. Drain pasta and go to town.


    * Kevin lives with his cat Rose by the bay :) He has a sword in every room of the house, rocks the guitar hero, and will get extremely irritated with you if you do not tune his television to the HD channels. :)